So you have a videotape that needs editing. You want to remove unsteady or dark footage. Perhaps you would like to add titles, music, naaration or maybe just create a shortened highlight montage.
Where do I start ??
Below we will attempt to explain the different types of editing and some procedures to help make this creative process both efficient and fun.
Linear Editing
The simplest form of linear editing is called "assemble" editing or tape to tape. This is when you copy only the "good" parts of a tape over to a new tape.
"Insert" editing is when we electronically splice in a different scene, video or audio only, into the middle of an existing video tape while preserving the original timeline of the videotape.
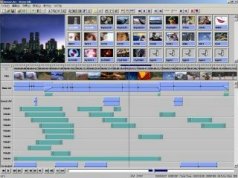
Non-Linear Editing
Non-linear editing is to video production what the word processor is to a typewriter. Real-time non-linear editing allows us to move, lengthen, shorten, insert, delete and modify video scenes, audio clips and titles without having to "re-edit" everything after the change as we would have to do in a linear editing suite. This means that changes that were impossible or cost prohibitive in a linear editing suite are routine and affordable in a non-linear suite.
Because of this, the customer does not have to be present in the editing suite during the entire editing process -- they can be present during the final editing stages and still be assured that any changes they wish can be made. It also means that at any point you can easily experiment with audio, video and effects possibilities to see how you like them. Your non-linear production can also be archived digitally so we can re-load your edited production at any time in the future and make necessary modifications to video, audio and on-screen text or graphics to keep your production current.
Real-time non-linear editing adds creativity, flexibility and saves you money now -- and in the future. It is the only solution for high-quality, cost-effective digital post production.
Videotape Logging
Naturally, there's a rush of excitement after completing a video shoot. You can't wait to take your raw footage and get right down to editing. However, in video production a quick start doesn't always mean a quick finish. Rushing into an editing session usually gets you the case of the Let's see disease: "Let's see, where's that shot of Ethel. Maybe it's on this tape. Gee, I thought it was right here. Let's see maybe I need to fast forward. "
Fumbling through video tape trying to find a shot can add hours to your editing time and become costly as well, particularly when you are renting a video suite. The solution is to log your video tapes before you begin editing. This can be done early in the production process.
Logging itself is simple. You just stick your tape in your VCR, rewind it to the beginning, press the reset button on your counter, and push play. Whenever you see an interesting shot write down a detailed description what it is (ex. close up shot of kid smiling and saying "I like skating") and the numbers on your VCR counter next to it. If you can't write the numbers down quickly enough, simply pause the tape until you do. You'll discover that logging your shots saves you tons of time once you begin editing. Furthermore, watching your tapes in a relaxed state rather than in the heat of production, might even give you a better idea of how you want to put your production together once you start editing. It might seem time consuming at first, but in the long run logging saves time.
Regardless of what approach you take to editing, previewing footage and making a “pencil-and-paper edit” can save considerable time.
Editing Worksheet (.PDF)
Time Code Window Dub
Since we know the logging process can be difficult to work through, we can simplify this task by creating a “window dub”.
Send us your video(s), we will digitize the footage, and create a working copy in vhs, dvd or cd with the time code on your TV screen. Besides making it easier on your eyes, this process will assure that the time numbers you use to create your edit decision list will match exactly during your edit session. Below is an example of a typical logging worksheet.
EDIT DECISION LIST - sample
sequence
|
tape #
|
start time
|
end time
|
scene description
|
|
1
|
3
|
2:20
|
2:56
|
child jumping rope
|
|
2
|
3
|
4:45
|
5:10
|
person walking through doorway
|
|
3
|
1
|
15:40
|
16:40
|
man talking about park "on a sunny day......... our many facilities."
|
|
|
|
|
|
|
|
|
|
|
|
|
|
|
|
|
|
|
|
|
|
|
|
|
|
|
|
|
|
|
|
|
|
|
|
|
|
|
|
|
|
|
|
|
|
|
|
|
|
|
|
|
|
|
|
|
|
|
|
|
|
|
|
|
|
|
Please feel free to contact us if you have any questions. Happy Editing.
Editing Home EDITING FAQ Editing Worksheet (.PDF)

